
First Chest
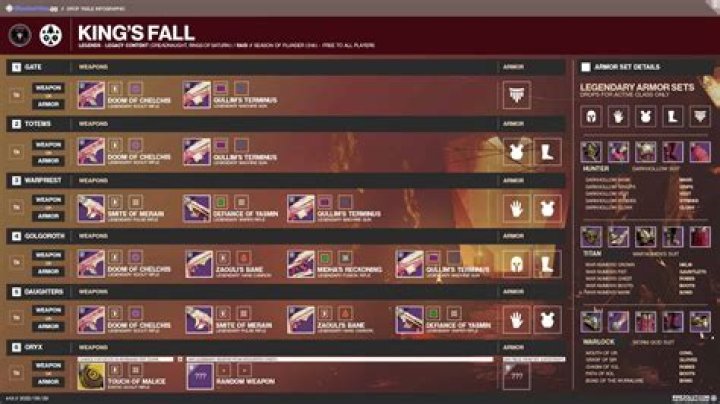
- Antiquated Rune
- Ghost
- Mouldering Shards
Second Chest - Through the Barriers
Note:
This chest is hidden. See this guide to learn where you can find it.
- Ammo Synth
- Antiquated Rune
- Ghost
- Hadium Flakes
- Mouldering Shards
- Wormspore
Third Chest
- Antiquated Rune
- Fusion Rifle
- Ghost
- Mouldering Shards
Boss #1 - The Warpriest
- Antiquated Rune
- Fusion Rifle
- Ghost
- Heavy Weapon
- Mouldering Shards
Fourth Chest
- Antiquated Rune
- Mouldering Shards
Boss #2 - Golgoroth
- Antiquated Rune
- Boots
- Chest
- Fusion Rifle
- Gloves
- Mouldering Shards
- Shotgun
Fifth Chest - Transept Jump Puzzle
Note:
This chest is hidden. See this guide to learn where you can find it.
- Ammo Synth
- Antiquated Rune
- Exotic Armor
- Exotic Weapon
- Hadium Flakes
- Mouldering Shards
Boss #3 - Daughters of Oryx
- Antiquated Rune
- Artifact
- Fusion Rifle
- Mouldering Shards
- Shotgun
Boss #4 - Oryx, The Taken King
Note:
Having 20+ shards in your posession upon killing Oryx allows you to have a second loot roll allowing you to obtain a random second item. This second item can be any item from the entire raid's loot pool, meaning that Oryx can drop any of the items above in addition to his exclusive items.
- Antiquated Rune
- Artifact
- Emblem
- Exotic Armor
- Exotic Weapon
- Ghost
- Helmet
- Mouldering Shards
- Primary Weapon
- Shader